

Introduction
In this post, I will go through the details of how I setup Caddy and DuckDNS on my Raspberry PI to enable SSL connections to my home network. Handy when you want to access your home networks remotely or when you want to host a web service from your RPI. Personally I use it to control some home automation tasks via web hooks through IFTTT.
Prerequisites
- Raspberry PI connected to the internet (any model will do)
- Raspbian OS
- DuckDNS account
Setting up DuckDNS
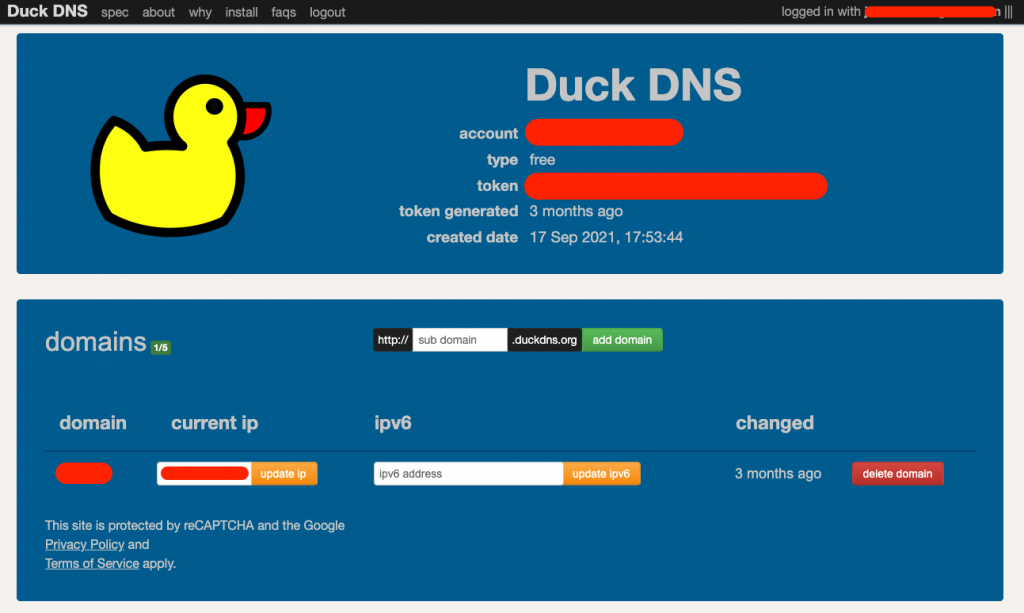
DuckDNS is a handy service that allows you to dynamically update a DNS record to point to your current home IP address. You’ll never have to worry about a changing home IP address again when you want to reach your internal services.
Login to DuckDNS, create a preferred subdomain and retrieve your token.
Now SSH to your Raspberry PI terminal and execute following commands.
mkdir duckdns
cd duckdns
nano duck.sh
Paste the following in your duck.sh file, switch out the token and domain prefix. The prefix is the first part of your subdomain e.g. test.duckdns.org ==> test
echo url="https://www.duckdns.org/update?domains=<your_domain_prefix>&token=<your_token>&ip=" | curl -k -o ~/duckdns/duck.log -K -We’ll make a cron task to update your home IP dynamically.
sudo chmod 700 duck.sh
crontab -e
At the bottom of the file that opened, add this line.
*/5 * * * * ~/duckdns/duck.sh >/dev/null 2>&1Save the file by pressing ctrl+x
./duck.sh
cat duck.log
These 2 commands should output OK if the output is KO something went wrong and you have probably filled in a wrong token / domain in the duck.sh file. If the output is OK, start the cronjob using this command..
sudo service cron startStatic local IP and port forwarding
Now that we’ve got a DNS record pointing at our home IP, we want external requests to be able to reach the Raspberry PI. To do this, the Raspberry PI needs a static local IP and we need to forward port 80 & 443 to the device.
# Check DHCP status
sudo service dhcpcd status
# If it is not active, enable it using these commands
sudo service dhcpcd start
sudo systemctl enable dhcpcd
# Open DHCP config
sudo nano /etc/dhcpcd.conf
You have now opened the DHCP config file, find the following lines in the file, uncomment them and add your desired static IP. I chose 192.168.0.100, note that some routers use a different local IP range such as 192.168.1.xxx. Adjust accordingly.
interface eth0
static ip_address=192.168.0.100/24
static routers=192.168.0.1
static domain_name_servers=192.168.0.1 8.8.8.8 8.8.4.4
Now reboot your RPI to apply static IP settings.
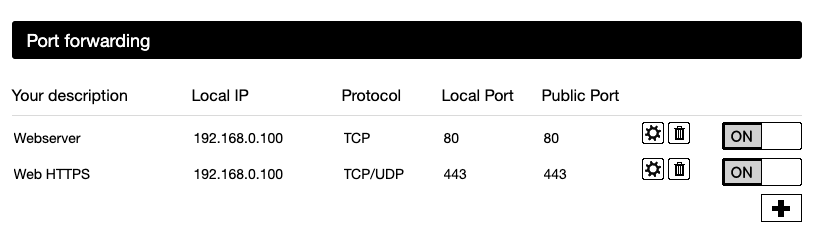
sudo rebootYour RPI now has a static local address of 192.168.0.100. Now go to your router settings and forward port 80 and 443 to that address. This is different for every brand of router but usually the admin interface is accessible through a browser when going to your router IP http://192.168.0.1
Setting up Caddy
Now that we got a DNS record dynamically pointing at our home IP, we can use a webserver like caddy to handle incoming requests on port 80 and 443. In this example we’ll setup caddy to automatically redirect requests to https and display a simple website. Install Caddy on the Raspberry PI using the following commands.
cd ~
sudo apt install -y debian-keyring debian-archive-keyring apt-transport-https
curl -1sLf 'https://dl.cloudsmith.io/public/caddy/stable/gpg.key' | sudo tee /etc/apt/trusted.gpg.d/caddy-stable.asc
curl -1sLf 'https://dl.cloudsmith.io/public/caddy/stable/debian.deb.txt' | sudo tee /etc/apt/sources.list.d/caddy-stable.list
sudo apt update
sudo apt install caddy
Now that caddy is installed and running as a service, we can edit the Caddyfile to serve content on our domain.
sudo nano /etc/caddy/Caddyfile:80 {
redir * https://{host}{uri} 301
}
your_domain.duckdns.org {
respond * "Hello World" 200 {
close
}
}
:443 {
respond * "Access denied" 403 {
close
}
}sudo systemctl restart caddyhttps://your_domain.duckdns.org should now display Hello World under a secure connection. If you go to the http version, it will auto redirect to https.
Caddy took care of certificates and SSL termination in the background without extra setup needed. This is the power of Caddy compared to Nginx/Apache. Of course Caddy can now be used to serve an actual website or web service using the reverse_proxy package or php_fast_cgi.
[Optional] Setting up an actual domain
Having setup all this, you might want to point an actual domain you own to your setup. The easiest way to do this is by creating a CNAME record to your duckdns domain. Add a subdomain record as a CNAME to your DNS settings (probably where you registered the domain).
CNAME blog.yourdomain.com -> your_domain.duckdns.org
Now simply replace the host in the Caddyfile to be your proper domain.
blog.yourdomain.com {
	respond * "Hello World" 200 {
		close
	}
}Note: You can not point your root domain as a CNAME. A root domain needs to point to an IP address. Thus using this method it is not possible to point https://yourdomain.com to your duckdns subdomain. It is however possible to point www as a CNAME to duckdns. You could now make the root of your domain redirect to www.